Getting Started with Azure Data Studio
February 2, 2021
For years, SQL Server Management Studio (SSMS) has been my go-to GUI tool for administering SQL Server instances, creating and modifying databases, and viewing and changing data. In many cases, however, it seems a little too heavy for the job – at least when it comes down to some of the basic developer-related needs such as viewing and editing data.
On my last two projects, I decided to give Azure Data Studio a try to see how it measured up to SSMS. Azure Data Studio gives you a more modern editor experience. It’s comparable to Visual Studio Code with IntelliSense, source control with GIT, and an integrated terminal for Powershell or SQLMD commands.
Azure Data Studio was built with a data platform user in mind, and its easy editing and export options, built-in charting of query results, and customizable dashboards make it an incredibly valuable tool.
In this post, I’ll go over some of the basics of how to use Azure Data Studio.
Install
Azure Data Studio is cross-platform and available on Windows, macOS, and Linux. It installs just like most Microsoft products these days, so check out their documentation for all the various options on their Download and Install and Release Notes pages.
Connecting to a Database Server
Azure Data Studio will allow you to connect and query SQL Server, Azure SQL Databases, and even PostgreSQL (with the PostgreSQL extension).
To connect to SQL Server, start up Azure Data Studio. You will be brought to the Welcome Dashboard:
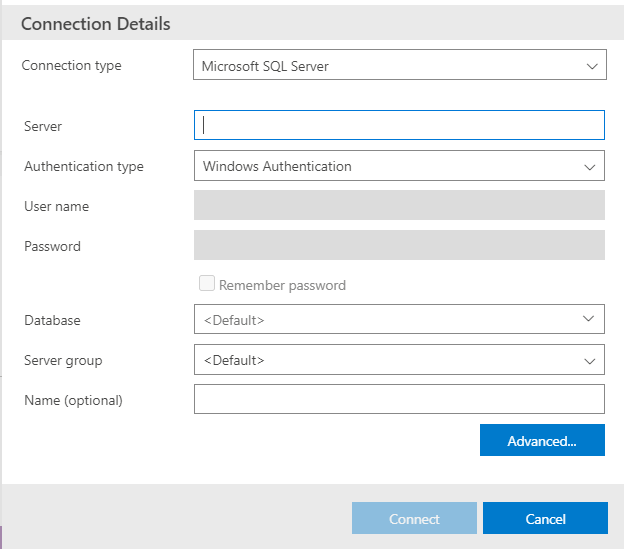
Next, select Create New Connection and enter your Server Name (or localhost), Authentication Type, User Name, Password, Database Name, and Server Group :
Click Connect to log into the Server.
Connecting to Azure SQL Database and PostgreSQL are similar processes. More detailed instructions can be found at the following QuickStarts:
Query Data
Now that you are connected, click localhost (or the server you are connected to). Then, click Databases. You can browse through all the database objects just like SSMS or right-click on a database and select Manage:
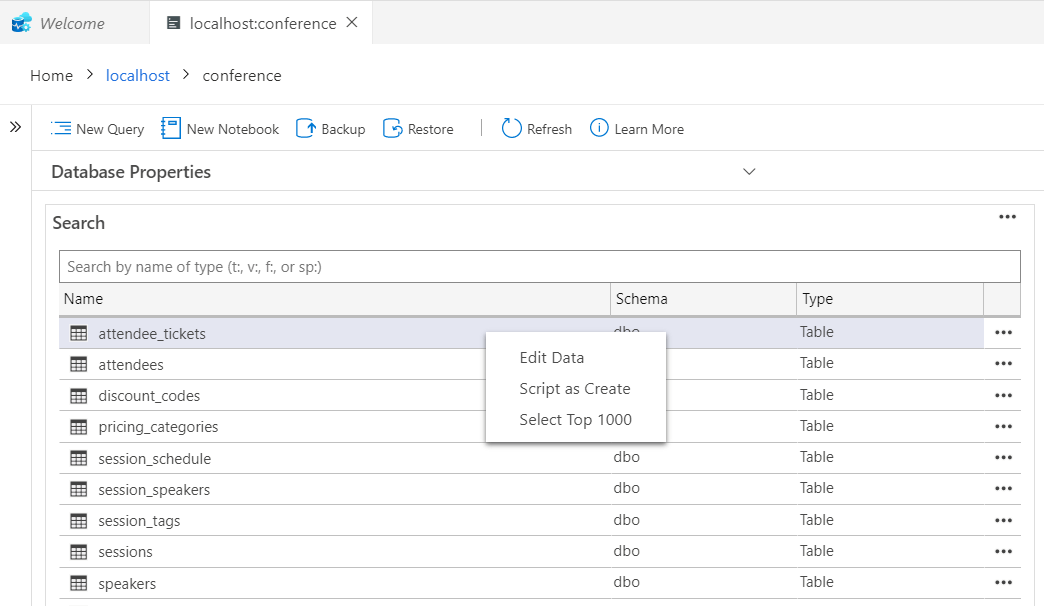
A dashboard for the selected database will be displayed. You can start a New Query, search for a table, or right-click on a database object to edit or select data. The ability to search is great when you have a large list of tables.
Select Top 1000 opens up a new Query tab for the table. A typical grid of data will be displayed like SSMS, but on the right, you will have one-click options to Save as CSV, Excel, XML, or Json and to switch to a Chart view.
The Chart View can add an interesting dynamic to analysis depending on the query:
For additional information on Querying with Azure Data Studio checkout this article ->
Using the T-SQL Editor.
Source Control Integration with GIT
Azure Data Studio inherits its Git implementation from VS Code. For more information about working with Git, see the documentation located here -> Git support in VS Code.
Using Insight Widgets
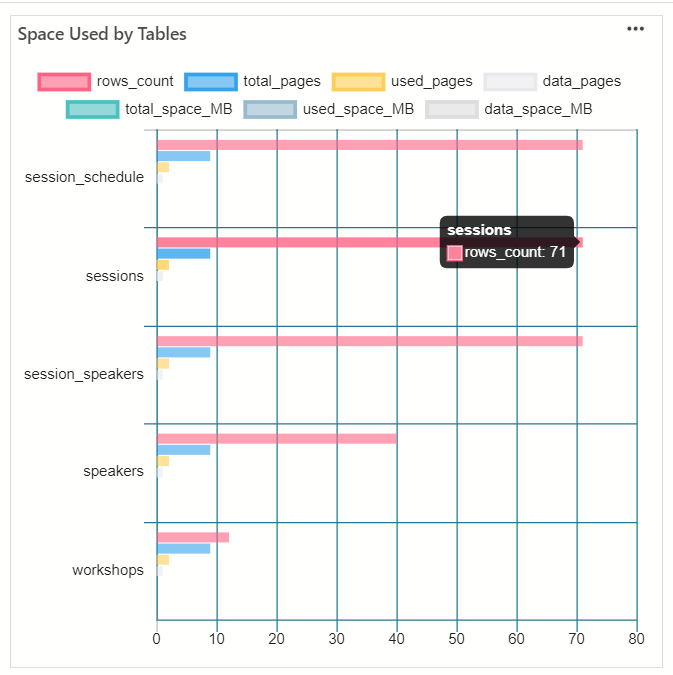
Insight widgets take queries and turn them into customizable charts and graphs. You can also add these to server and database monitoring dashboards. Let’s turn on the built-in Tablespace Usage Insight Widget to see what it looks like.
Go to File -> Preferences -> Settings and search for dashboard.database.widgets. You’ll find it under Data -> Dashboard, then Database: Widgets. Click Edit in settings.json:
Add the following code, so dashboard.database.widgets has the following:
Save the settings.json file (Ctrl+S).
Now, when you right-click on your Database and select Manage, you will get something similar to the following widget:
The chart provides filtering and mouse-hover details as you move around and select the headings. Pretty handy!
Additional information and examples can be found here -> Manage servers and databases with Insight widgets in Azure Data Studio.
Wrapping Up
Hopefully, this has been a good overview to get you started using Azure Data Studio. Here are some last-minute thoughts on when you may want to use Azure Data Studio vs. SQL Server Management Studio.
Use Azure Data Studio if you…
- Are running on macOS or Linux or are looking for a more Visual Studio Code feel on Windows
- Do not need to do anything related to administration or configuration or are comfortable with the integrated terminal using SQLMD or PowerShell
- Are mostly editing or executing queries and exporting data
- Need to be able to chart and visualize results
- Need GIT integration or want to use many of the 3rd party extensions that are available
Use SQL Server Management Studio if you…
- Are doing complex administrative and configuration
- Are doing security, user management, and configuration of security features
- Need to make use of performance tuning advisors and dashboards
- Use database diagrams and table designers
- Need access to Registered Servers
- Make use of live query stats or client statistics
Additional Resources:
I hope this post helped prepare you to get started with Azure Data Studio on your own! If you’re looking for more information, take a look at these resources. I’ve found them helpful.
More From Todd Horn
About Keyhole Software
Expert team of software developer consultants solving complex software challenges for U.S. clients.


