
Using C#, XAML + Uno Platform to Build One Codebase, Cross-Platform Apps
For more than a decade, we have been developing applications with C# and XAML. Throughout that time, the pair has really only been known for Desktop (WPF) and UWP applications.
Later came Xamarin, which utilizes C# as a unified language to share between all platforms. Then Xamarin.Forms was introduced, which was different in that it utilized XAML to develop the user interface with a single codebase for cross-platform (iOS, Android, UWP).
This progression has excited all the WPF developers out there. The only remaining platform left was web development. At one time, Silverlight was the option, but it was deprecated because of heavy loading and security concerns of browser plug-in solutions.
Then came the WebAssembly [also known as Web Assembly Modules (WASM)] that web browsers can directly execute without having to parse a source file.
In this post, we will discuss how to create a rich user browser interface using the cross-platform Uno Platform and WebAssembly technology. The example application will walk through building Models, ViewModel and View under a shared project that is common to all different platform-specific projects.
What is WASM?
WebAssembly is a parallel technology to JavaScript. It exists side by side with the JavaScript runtime in the web browser’s runtime. It also shares the browser sandbox’s security context. So, unlike plug-ins of old, WebAssembly can’t access computer hardware or OS features.
WebAssembly is not a new Silverlight in that respect; it relies on the same browser runtime that JavaScript relies on.
Uno Platform (Open Source)
There are a couple of known platform developments going on that utilize WebAssembly and target the C# and XAML language to develop a web-based application.
Uno is an open-source platform that provides XAML and C# to develop a cross-platform application (iOS, Android, UWP, WASM) and supports MVVM Light, MS XAML Behaviours, Reactive UI and any existing UWP project.
Here, I borrow the architecture diagram from the platform.uno website. On iOS and Android, the Uno Platform relies extensively on the Xamarin Native stack. On WebAssembly, the Uno Platform relies directly on the Mono-Wasm runtime. So with a single codebase, using C# and XAML, Uno Platform allows the development of applications on all of these platforms.

Getting Started with the Uno Platform
Prerequisites
Prerequisites include Visual Studio 2019 (latest release), with the Universal Windows Platform, mobile development with .NET and ASP.NET, and web workloads installed. Visual Studio 2017 15.5 or later is also supported, although a few of the steps might be slightly different.
Installing the App Templates with Visual Studio
Launch Visual Studio, then click Continue without code. Click Extensions -> Manage Extensions from the menu bar. In the Extension Manager, expand the online node and search for Uno. Download the Uno Platform Solution Templates extension and restart Visual Studio.

Create a new project for Cross-Platform App (Uno Project). Here, we create the project name ConsultantManagement that demonstrates how we can build a single code base cross-platform application.
Create a new C# solution using the Cross-Platform App (Uno Platform) template, from Visual Studio’s Start Page:

Right-click on the Solution and select Manage NuGet Packages for Solution from the context menu. Click on the Updates tab, uncheck the include prerelease, and update any of the packages that may need to update.
Finally, install the Refactored.MvvmHelpers NuGet Packages to each of the projects in your solution. This is what the Solution Explorer looks like:

Here, we can focus on adding code files only under ConsultantManagement.Shared project that is the shared projects for all other platforms.
Setting up Modals and ViewModel
Add Model and ViewModel folders in the Shared Project. For our sample application, add new types under Model as below:
public class Client : ObservableObject
    {
        private string name;
        public string Name
        {
            get => name;
            set => SetProperty(ref name, value);
        }
    }

public class Consultant : ObservableObject
    {
        private string firstName;
        public string FirstName
        {
            get => firstName;
            set => SetProperty(ref firstName, value);
        }

        private string type;
        public string Type
        {
            get => type;
            set => SetProperty(ref type, value);
        }
        public ObservableRangeCollection<Client> Clients { get; set; } = new ObservableRangeCollection<Client>();
    }
Under ViewModel, create the MainPageViewModel class to handle the MainPageView:
public class MainPageViewModel : ObservableObject
    {
        public ObservableCollection<Consultant> Consultants { get => DataProvider.Instance.Consultants; }

        private Consultant newConsultant = new Consultant();
        public Consultant NewConsultant
        {
            get => newConsultant;
            set => SetProperty(ref newConsultant, value);
        }

        private Client newClient = new Client();
        public Client NewClient
        {
            get => newClient;
            set => SetProperty(ref newClient, value);
        }

        #region Commands
        private ICommand addConsultantCommand;
        public ICommand AddConsultantCommand
        {
            get
            {
                if (addConsultantCommand == null)
                {
                    addConsultantCommand = new RelayCommand(() =>
                    {
                        if (!String.IsNullOrWhiteSpace(NewConsultant.FirstName))
                        {
                            DataProvider.Instance.Consultants.Insert(0, NewConsultant);
                            NewConsultant = new Consultant();
                        }
                    });
                }
                return addConsultantCommand;
            }
        }

        private ICommand addClientCommand;
        public ICommand AddClientCommand
        {
            get
            {
                if (addClientCommand == null)
                {
                    addClientCommand = new RelayCommand(() =>
                    {
                        NewConsultant.Clients.Add(NewClient);
                        NewClient = new Client();
                    });
                }
                return addClientCommand;
            }
        }
        #endregion
    }
Here is the code behind on MainPage.xaml.cs to instantiate and assign MainPageViewModel to its DataContext:
public sealed partial class MainPage : Page
    {
        public MainPageViewModel ViewModel { get; set; }
        public MainPage()
        {
            this.InitializeComponent();
            ViewModel = new MainPageViewModel();
            this.DataContext = ViewModel;
        }
    }
All of the UI stuff is written in XAML on MainPage.xaml
<Page
    x:Class="ConsultantManagement.MainPage"
    xmlns="http://schemas.microsoft.com/winfx/2006/xaml/presentation"
    xmlns:x="http://schemas.microsoft.com/winfx/2006/xaml"
    xmlns:local="using:ConsultantManagement"
    xmlns:d="http://schemas.microsoft.com/expression/blend/2008"
    xmlns:mc="http://schemas.openxmlformats.org/markup-compatibility/2006"
    xmlns:viewModels="using:ConsultantManagement.Shared.ViewModels"
    mc:Ignorable="d">
    <ScrollViewer VerticalScrollBarVisibility="Auto" VerticalScrollMode="Auto"  Background="#FF222B3B">
        <StackPanel Orientation="Vertical" Margin="30">
            <Grid Padding="10">
                <Grid.ColumnDefinitions>
                    <ColumnDefinition Width="*"></ColumnDefinition>
                    <ColumnDefinition Width="Auto"></ColumnDefinition>
                </Grid.ColumnDefinitions>
                <TextBlock Text="Consultants" Foreground="WhiteSmoke" FontSize="30" FontWeight="SemiBold"></TextBlock>
                <Button Grid.Column="1" Width="50" Height="45">
                    <Button.Content>
                        <Path Fill="#FF0077AF" StrokeThickness="3" Stretch="Fill" Data="F1 M 26.9167,38L 31.6667,38L 31.6667,45.9167L 39.5833,45.9167L 39.5833,50.6667L 31.6667,50.6667L 31.6667,58.5833L 26.9167,58.5833L 26.9167,50.6667L 19,50.6667L 19,45.9167L 26.9167,45.9167L 26.9167,38 Z M 38,19C 43.5417,19 45.9167,22.1667 45.1174,28.8134C 45.8315,29.2229 46.3125,29.9928 46.3125,30.875C 46.3125,31.9545 45.5923,32.8658 44.6061,33.1546C 44.1941,34.623 43.5543,35.9229 42.75,36.9628L 42.75,41.9583C 45.3889,42.4861 47.5,42.75 50.6667,44.3333C 53.8333,45.9167 54.8889,47.3681 57,49.4792L 57,57L 33.25,57L 33.25,52.25L 41.1667,52.25L 41.1666,44.3333L 33.25,44.3333L 33.25,36.9628L 33.25,36.4167L 32.8586,36.4167C 32.237,35.4811 31.7366,34.3762 31.3939,33.1546C 30.4077,32.8658 29.6875,31.9545 29.6875,30.875C 29.6875,29.9928 30.1685,29.2229 30.8826,28.8134C 30.0833,22.1667 32.4583,19 38,19 Z M 19,57L 19,52.25L 25.3333,52.25L 25.3333,57L 19,57 Z"/>
                    </Button.Content>
                    <Button.Flyout>
                        <Flyout Placement="Full">
                            <Grid MinWidth="300" MinHeight="300">
                                <Grid.RowDefinitions>
                                    <RowDefinition Height="*"></RowDefinition>
                                    <RowDefinition Height="Auto"></RowDefinition>
                                </Grid.RowDefinitions>
                                <StackPanel Orientation="Vertical">
                                    <TextBox Margin="3" Text="{Binding NewConsultant.FirstName, Mode=TwoWay}" PlaceholderText="FirstName"></TextBox>
                                    <TextBox Margin="3" Text="{Binding NewConsultant.Type, Mode=TwoWay}" PlaceholderText="Profession"></TextBox>
                                    <ItemsControl ItemsSource="{Binding NewConsultant.Clients}">
                                        <ItemsControl.ItemTemplate>
                                            <DataTemplate>
                                                <TextBox Margin="3" Text="{Binding Name, Mode=TwoWay}" PlaceholderText="Company"></TextBox>
                                            </DataTemplate>
                                        </ItemsControl.ItemTemplate>
                                    </ItemsControl>
                                    <Grid Margin="3" HorizontalAlignment="Stretch">
                                        <Grid.ColumnDefinitions>
                                            <ColumnDefinition Width="*"></ColumnDefinition>
                                            <ColumnDefinition Width="Auto"></ColumnDefinition>
                                        </Grid.ColumnDefinitions>
                                        <TextBox Text="{Binding NewClient.Name, Mode=TwoWay}" PlaceholderText="Company"></TextBox>
                                        <Button Grid.Column="1" HorizontalAlignment="Right" HorizontalContentAlignment="Right" Content="Add" Command="{Binding AddClientCommand}"></Button>
                                    </Grid>
                                </StackPanel>
                                <Button HorizontalAlignment="Stretch" Grid.Row="1" Margin="3" Command="{Binding AddConsultantCommand}" Content="Confirm" VerticalAlignment="Bottom" VerticalContentAlignment="Center"></Button>
                            </Grid>
                        </Flyout>
                    </Button.Flyout>
                </Button>
            </Grid>
            <ItemsControl Margin="5,20,5,0" ItemsSource="{Binding Consultants}">
                <ItemsControl.ItemTemplate>
                    <DataTemplate>
                        <StackPanel Margin="0,3,0,3" Padding="5" Orientation="Vertical"  Background="#FF35496A">
                            <Grid>
                                <Grid.ColumnDefinitions>
                                    <ColumnDefinition Width="*"></ColumnDefinition>
                                    <ColumnDefinition Width="Auto"></ColumnDefinition>
                                </Grid.ColumnDefinitions>
                                <TextBlock FontWeight="SemiBold" FontSize="25" Text="{Binding FirstName, Mode=TwoWay}"></TextBlock>
                                <TextBlock Grid.Column="1" VerticalAlignment="Center" FontWeight="Medium" Padding="3" FontSize="15" Text="{Binding Type, Mode=TwoWay}"></TextBlock>
                            </Grid>
                            <ItemsControl ItemsSource="{Binding Clients}">
                                <ItemsControl.ItemTemplate>
                                    <DataTemplate>
                                        <TextBlock FontWeight="Medium" FontSize="18" Text="{Binding Name, Mode=TwoWay}"></TextBlock>
                                    </DataTemplate>
                                </ItemsControl.ItemTemplate>
                            </ItemsControl>
                        </StackPanel>
                    </DataTemplate>
                </ItemsControl.ItemTemplate>
            </ItemsControl>
        </StackPanel>
    </ScrollViewer>
</Page>
Just for the sample project, our data source is predefined ObservableCollection of Consultant type under DataProvider.cs as below:
//This can be replaced with local database or web api call to fetch data
    public class DataProvider
    {
        private static DataProvider instance;
        public static DataProvider Instance
        {
            get
            {
                if (instance == null)
                {
                    instance = new DataProvider();
                }
                return instance;
            }
        }

        public ObservableCollection<Consultant> Consultants { get; set; }

        private DataProvider()
        {
            Consultants = new ObservableCollection<Consultant>
            {
                new Consultant()
                {
                    FirstName = "Richard",
                    Type = "Front-End",
                    Clients = new ObservableRangeCollection<Client>()
                    {
                        new Client() { Name = "Microsoft" },
                        new Client() { Name = "ALink Company"},
                        new Client() { Name = "Startup 123"}
                    }
                },
                new Consultant()
                {
                    FirstName = "John",
                    Type = "Full-Stack Web",
                    Clients = new ObservableRangeCollection<Client>()
                    {
                        new Client() { Name = "Tesla" }
                    }
                },
                new Consultant()
                {
                    FirstName = "Brent",
                    Type = "Full-Stack Mobile",
                    Clients = new ObservableRangeCollection<Client>()
                    {
                        new Client() { Name = "XYZ Company" },
                        new Client() { Name = "G Finance"}
                    }
                }
            };
        }
    }
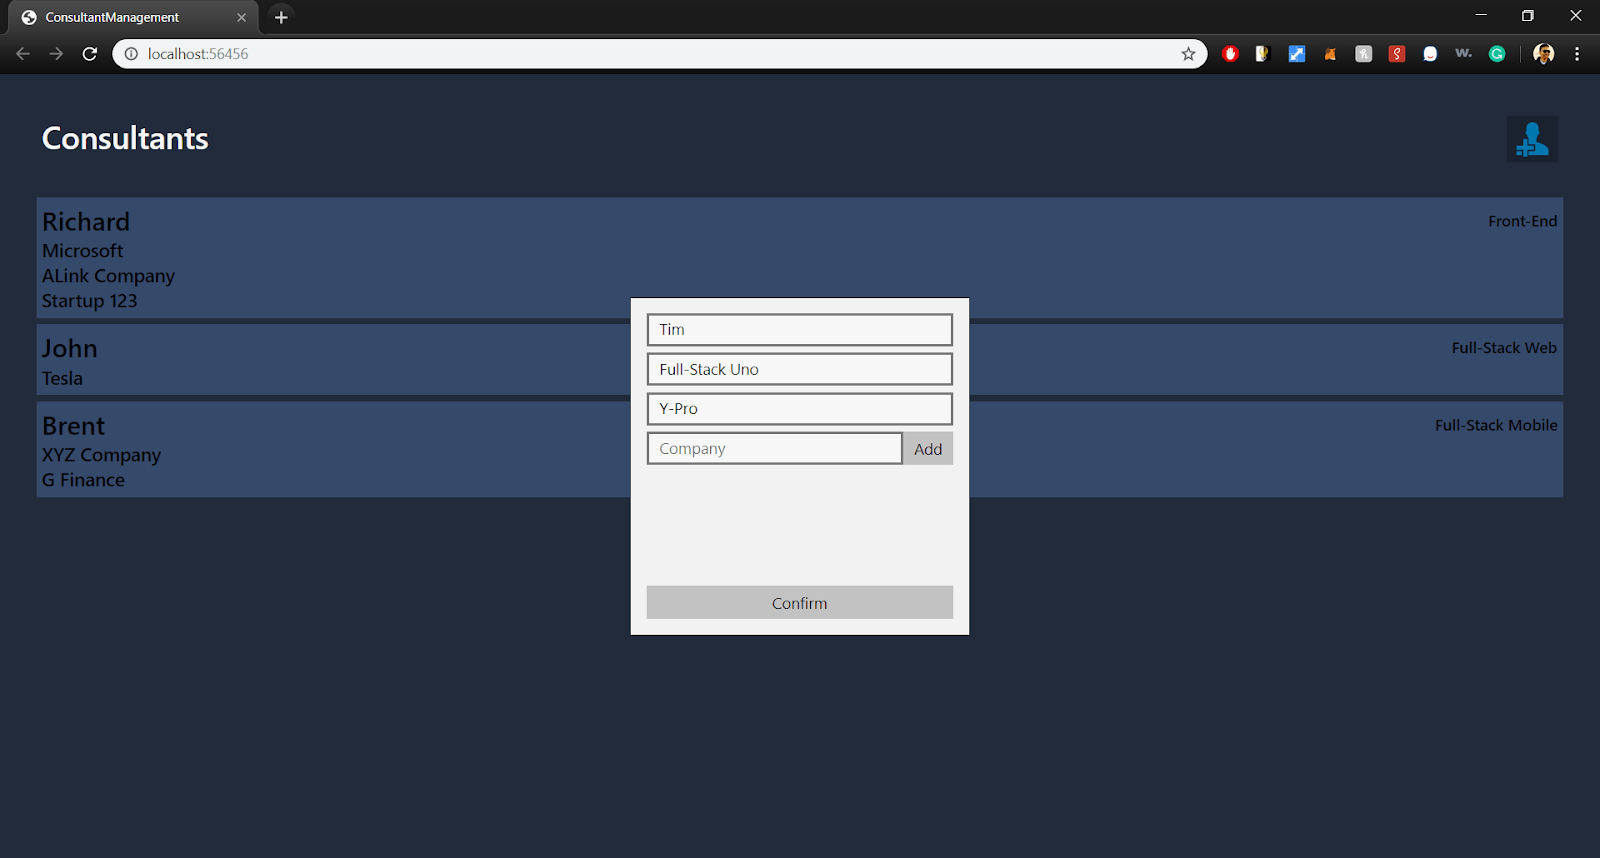
All set, screenshots of the application in different platforms are shown below:
WebAssembly Application (Chrome Browser)

UWP Application


Android Mobile App

IOS Mobile App

Code Sample Links
- Consultant-Management Project (GitHub link)
- Code samples from platform.uno
- Blogs related to Uno platform
Final Thoughts
This blog demonstrated the development of a single-page application using the Uno platform – this approach allowed us to write code in the powerful XAML and C# languages like we used to do for WPF app development. The codebase is also 100% shared between all of these platforms (iOS, Android, UWP and WebAssembly).
I encourage you to check out the code sample in the GitHub link. We will explore the different possibilities, such as utilizing existing UWP project in this application, in future blogs.
More From Rukesh Shrestha
About Keyhole Software
Expert team of software developer consultants solving complex software challenges for U.S. clients.
Share This Post
Join The Thousands Of Devs Who Subscribe


cool