Why Mobile App Deployment Stops So Many Developers (And How To Beat It)
July 18, 2025

For us developers, getting a mobile app ready is only half the battle. The real challenge starts when it’s time to deploy it. You’ve built a great mobile app, tested it locally, and even proudly demoed it to your dog while lounging on the couch with the emulator open. But when it comes to deploying the app to Google Play or the App Store, everything slows down. This step stops a lot of great apps from moving forward.
Why? Because the deployment process is often confusing, poorly documented, and constantly evolving. You’ll find pieces of help spread across Stack Overflow, outdated YouTube tutorials, and official documentation that seems to always assume you already know more than you do. It can get overwhelming, especially if you’re doing it solo.
This post aims to simplify the process. I’ll walk you through how to deploy a ready-to-ship Flutter app for internal testing. So, your real-life testers can install and use your app through Google Play Internal Release and iOS’s Test Flight app.
This guide skips the Flutter development and will focus only on the deployment for internal testing.
How to deploy a Flutter App for Internal Testing on Android and iOS
First things you’ll do before a test release:
- Build a working Flutter app that builds cleanly in both Android Studio and Xcode
- Test your app works on both the Android emulator and iOS simulator
Distribute the Android App to Play Store
Follow these steps to distribute the Android App:
1. Create a Google Play Console Developer Account (One-Time Setup)
Before uploading your app to the Play Store, you’ll need a developer account:
- Go to the Google Play Console Sign-Up.
- Sign in with the Google account you want to use as the owner of the dev account. (This should be the google account logged into your Play Store app on your phone)
- Pay the $25 one-time registration fee.
- Follow the account setup steps.
- Once approved, you can start creating apps and managing releases from Google Play Console.
2. Create your app inside Google Play Console
 3. Enable Google Play App Signing
- Go to the Google Play Console
- Select the desired application.
- Navigate to Test and Release > App integrity > App Signing.
- Confirm “Signing by Google Play” is displayed (recommended)
4. Update Version & Build
- In Flutter, Android versioning is controlled by the `versionName` and `versionCode` properties in the `android/app/build.gradle` file.
- Update the versionName` following the major.minor.patch convention. This string is shown to the users in the Play Store.
- Increment the versionCode by at least 1 for each time you deploy. The versionCode helps determine whether one version is more recent than another.
Example:
![]()
5. Open your project in Android Studio
- Open Android Studio.
- Click File > Open.
- Navigate to and select the {project_name}/android/ folder.
6. Sync Gradle & Rebuild the Project
- Sync Gradle:
- Click File > Sync Project with Gradle Files.
- Rebuild the project:
- Click Build > Rebuild Project.
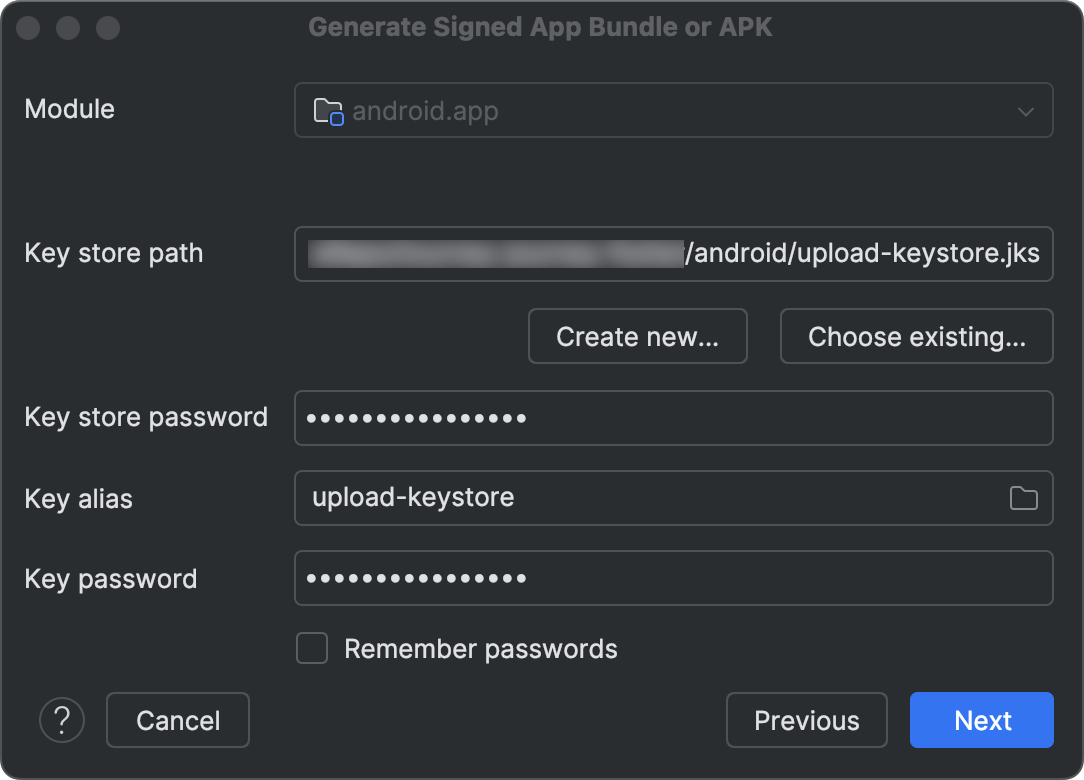
7. Generate a Signed .aab File (App Bundle) for Google Play Console
- In Android Studio, go to Build > Generate Signed Bundle / APK.
- Choose Android App Bundle, then click Next.
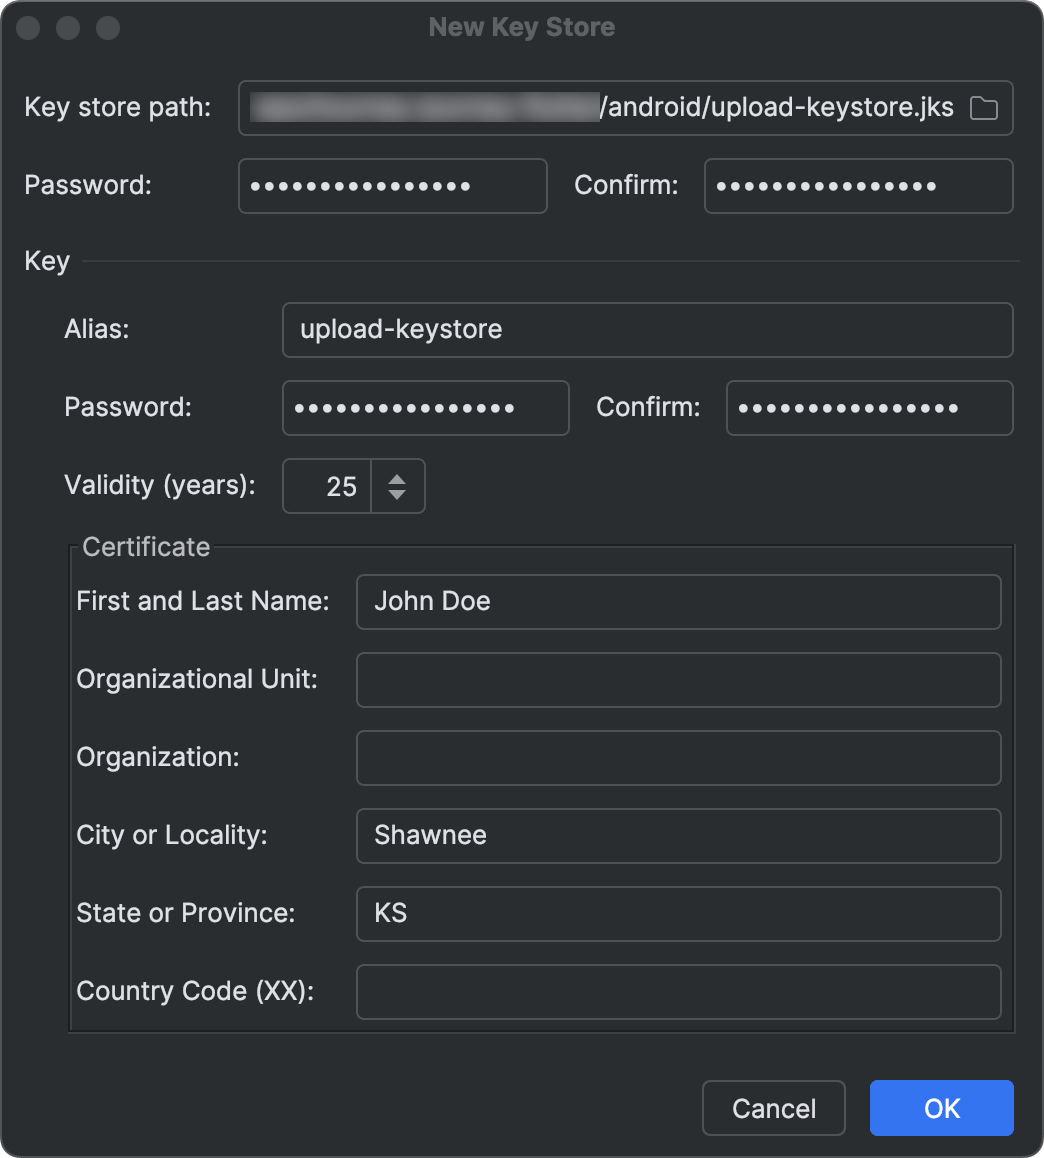
- Create a new keystore file (Or select an existing file if you already created one)
- Key store path should be in your projects android folder (android/app/upload-keystore.jks)
- Key alias (e.g. “upload_keystore”)
- Create your keystore password and key password and save these in a password manager.
7. Click Next.
8. Confirm the Destination Folder is: {project_name}/android/app
9. Select release from the Build Variants list. (Google Play Console requires release mode or it will fail)
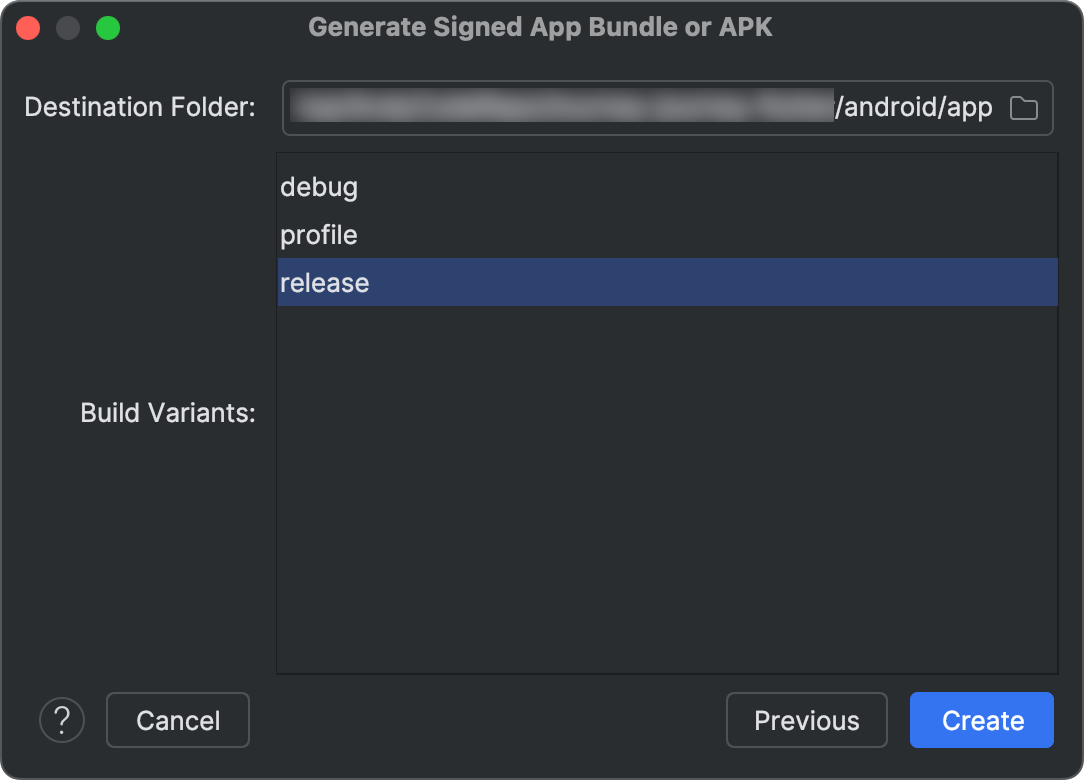
10. Click Create to generate the signed `.aab` file. (Output Location: android/app/release/app-release.aab)
8. Upload the Signed `.aab` to Google Play
- Go to the Google Play Console
- Select the desired application.
- Navigate to Test and Release > Testing > Internal Testing.
- Click “Create New Release”.
- Upload the new .aab file located at android/app/release/app-release.aab.
- Click Next to Preview and Confirm.
- Click “Save & Publish”.
- Your new release now displays inside Internal testing.

9. Internal Testing
- Add Testers to Internal Testing Track:
- Go to the Google Play Console
- Select the desired application.
- Navigate to Test and Release > Testing > Internal Testing.
- Click “Manage Testers”.
- Under “Testers”, select the testers list (or create one).
- Add QA testers email addresses.
- Click “Save”.
- Share the Google Play Download Link with QA:
- Go to Test and Release > Testing > Internal Testing.
- Copy the “Opt-in URL” link and send it to your testers.
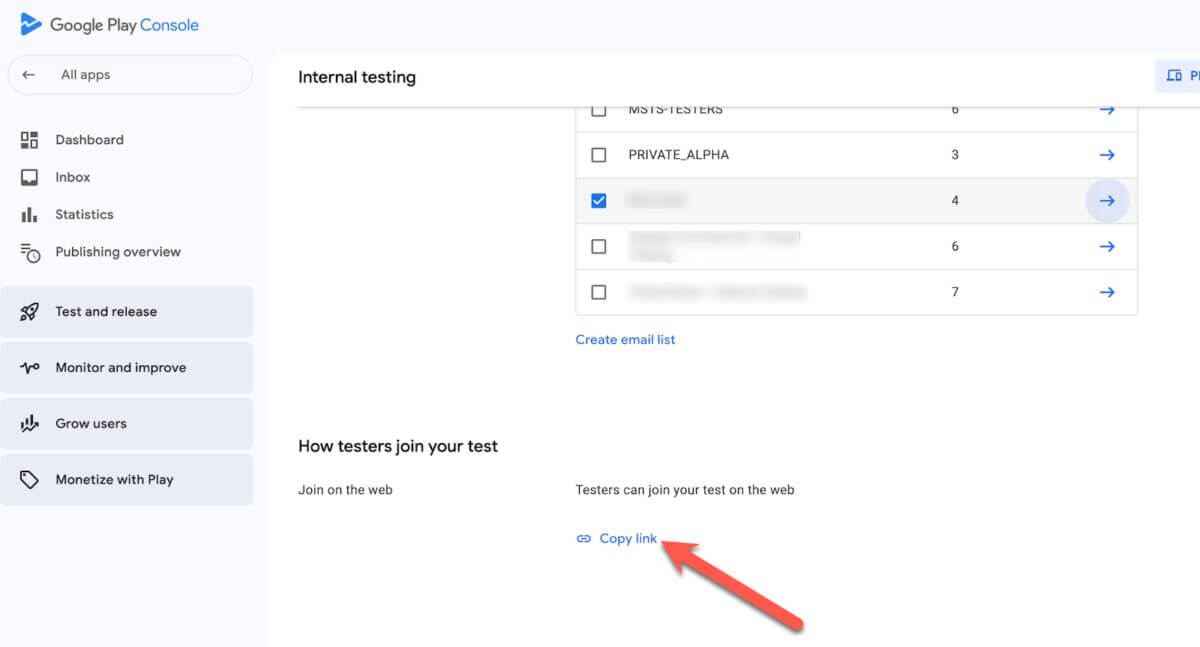
How Testers Install the App:
- Each tester must ensure they’re signed into the Google Play Store app using the same email address that was added to the Internal Testing track.
- Open the “Opt-in URL” on their Android device.
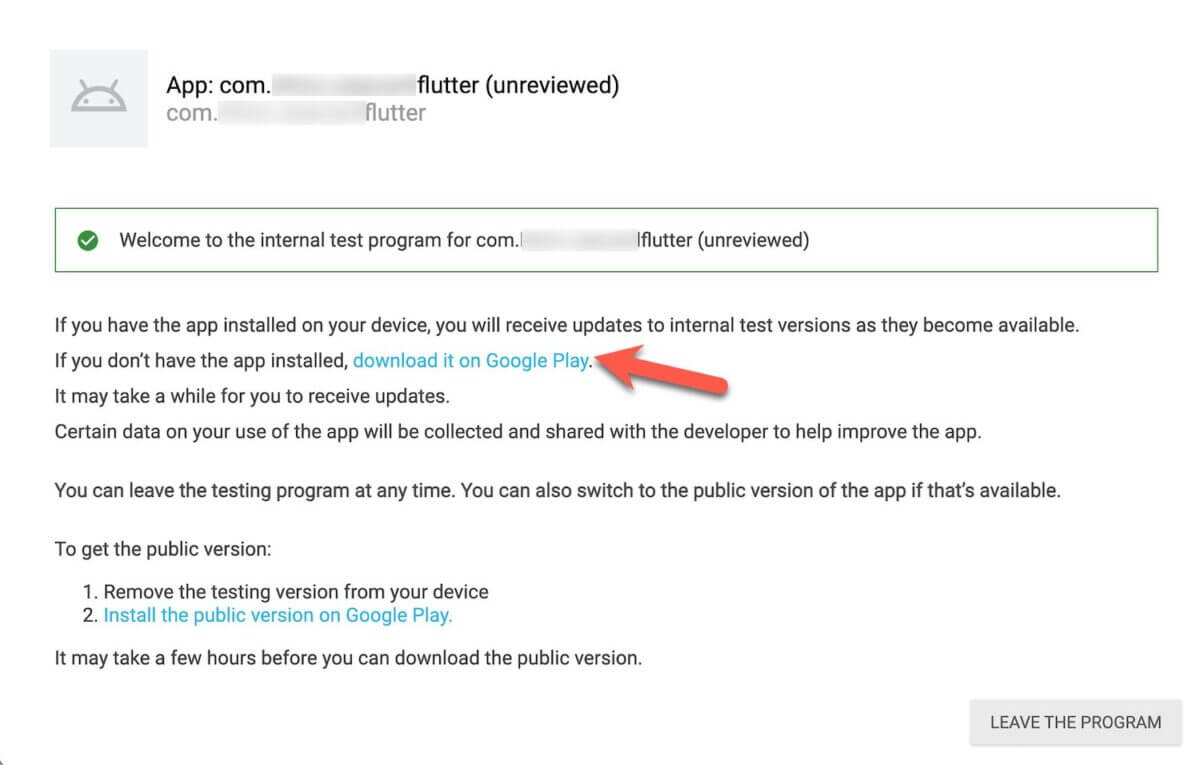
- Click “Join the Test”.
- Click “download in on Google Play”.
- Install the app directly from Google Play.
Important Notes:
- The app won’t appear in normal Google Play Store search; testers must use the Opt-in URL to download the app.
- If a new version of the app is released, the testers will only need to update the app in the Google Play Store. They can follow the same Opt-in URL and click “download it on google play” again.
iOS: Distribute via TestFlight
Follow these steps to distribute the iOS App:
1. Create a Apple Developer Account (One-Time Setup)
Before uploading your app to the App Store, you’ll need a developer account:
- Go to the Apple Developer account signup.
- Sign in with the Mac email address you want to use as the owner of the dev account.
- Pay the $99 annual fee.
- Follow the account setup steps.
Once approved, you can start creating apps and managing releases from App Store Connect.
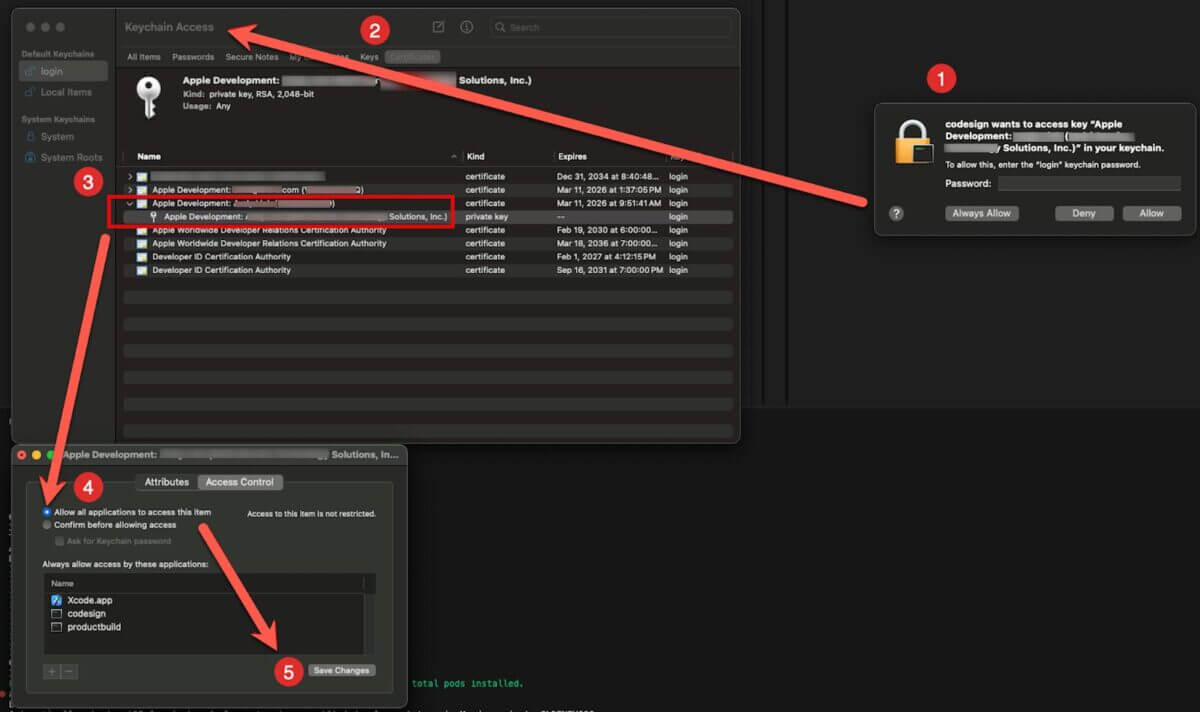
2. Set Up Keychain Access
Before building the IPA file, configure Keychain Access to allow Xcode to use the signing certificates.
- Open Keychain Access on your Mac.
- Navigate to Keychain Access → Default Keychains → login → Certificates tab.
- Locate “Apple Development: {Developer Name} ({Company_Name)”.
- Open the private key and go to the Access Control tab.
- Select “Allow all applications to access this item” and click Save Changes.
3. Update Version & Build in Xcode
- Open Xcode: Navigate to the iOS folder and open Runner.xcworkspace in Xcode.
- In Xcode, select Runner → Targets → Runner.
- Update the Version and Build Number:
- Under General -> Identity, update the Version field (e.g., 1.0.0). Increment based on the update type (Major, Minor, Patch).
- Update the Build field, incrementing it by 1 for each time you deploy.
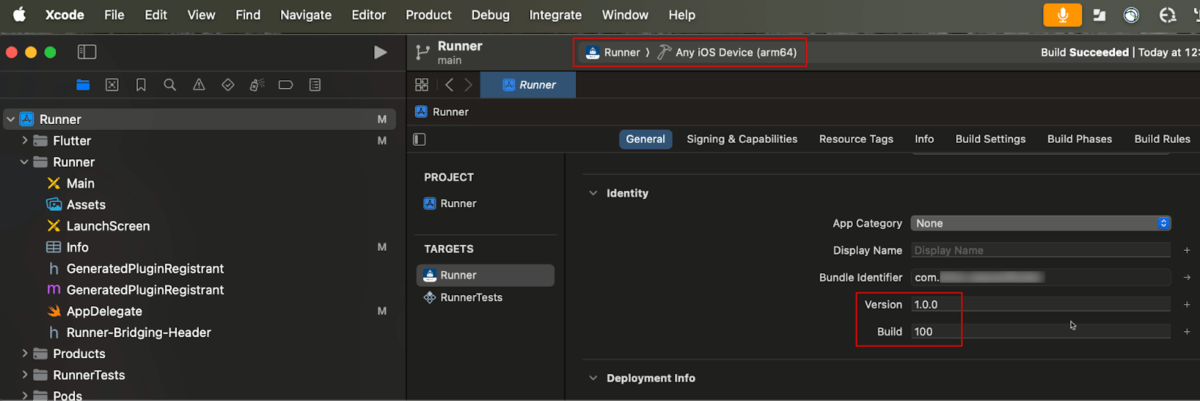
4. Run the build against any simulator (e.g. iPhone 16 Pro) and this will force the project.pbxproj file to update the version. You’ll want to commit this change to the git repo once you’re good with your changes.
5. Now ensure the Runner dropdown at the top-middle of Xcode is set to Any iOS Device (arm64).
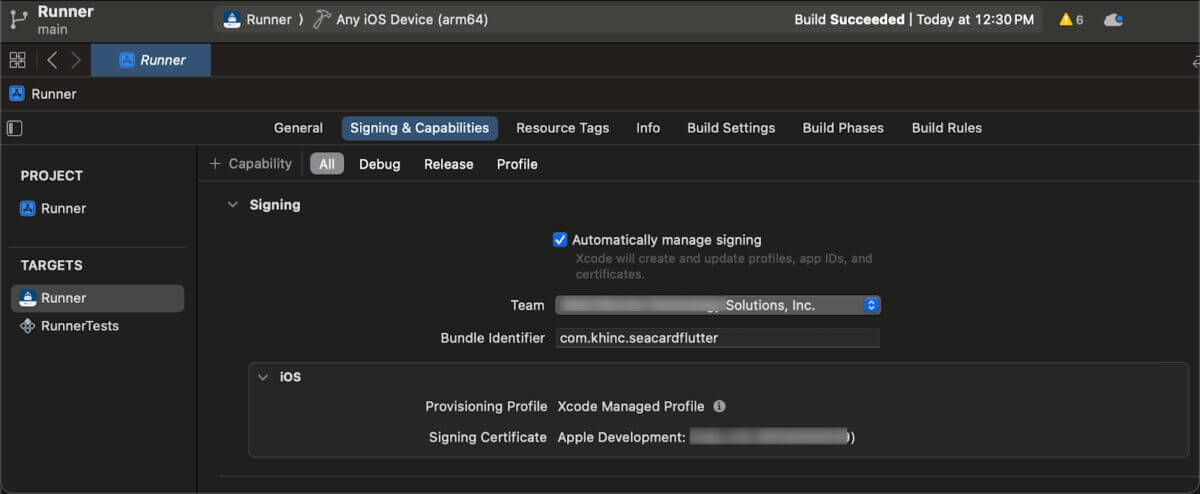
6. In Signing & Capabilities:
-
-
- Check Automatically manage signing.
- Set Team to your team name.
- Ensure there are no warnings or errors in this tab.
-
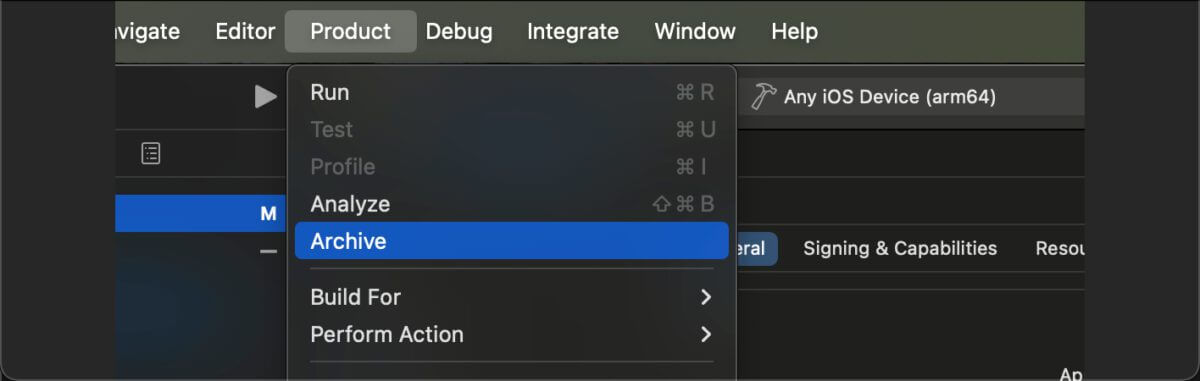
4. Archive and Distribute the App
- In Xcode, go to Product → Archive.
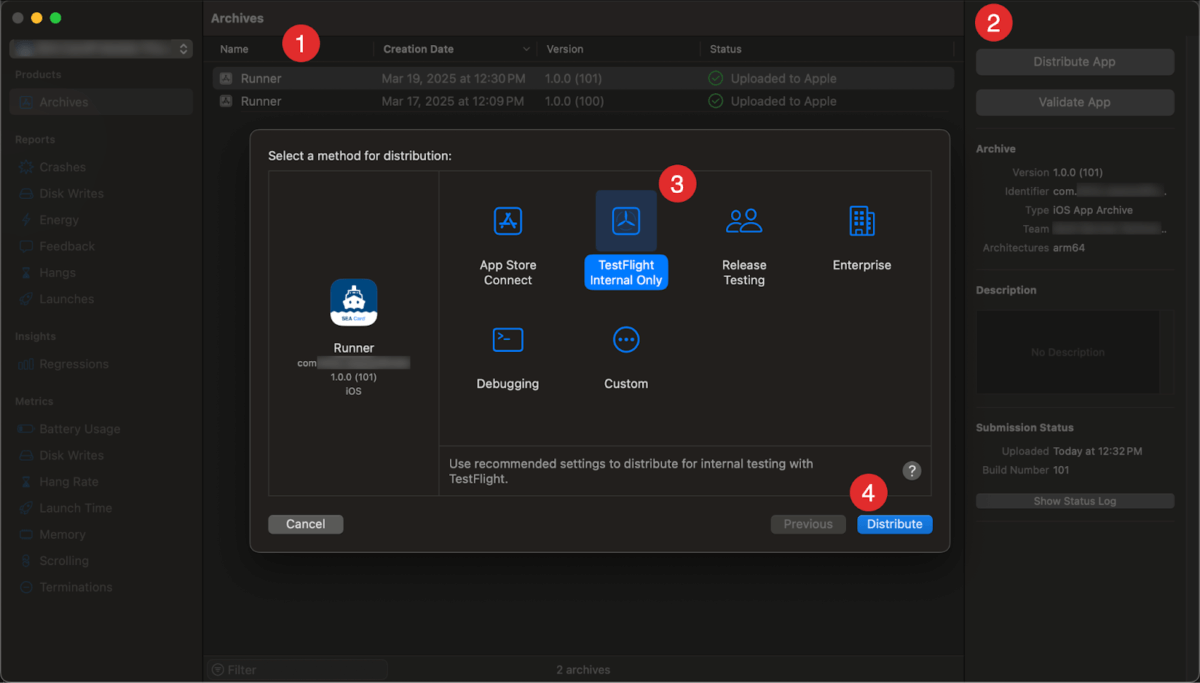
2. Distribute the App:
-
- Select the Runner archive and click Distribute App.
- Choose TestFlight Internal Only → For internal QA testing. (Our scenario for this blog)
- Follow the prompts and wait for the upload process to complete (~5 minutes).
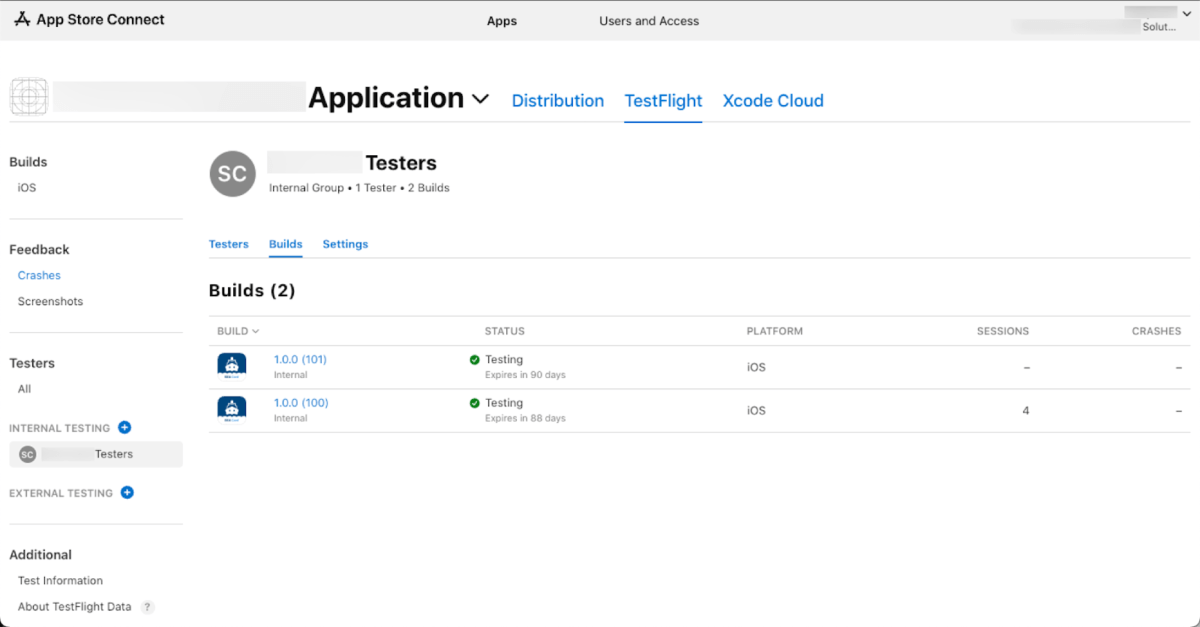
5. Confirm in App Store Connect
- Go to App Store Connect.
- Find your desired app.
- Check if the new iOS Build appears in the TestFlight tab → If deploying for internal testing. (Our scenario for this blog)
4. If you see Missing Compliance next to your build, click Manage
5. If prompted about App Encryption Documentation, select Standard.
6. If asked, “Is your app going to be available for distribution in France?” -> Select No.
7. Wait for the build to show Ready to Test (~30 minutes).
6. Download & Test on TestFlight
In App Store Connect invite your internal testers.

Once the app shows Ready to Test, testers can download “App Name” from TestFlight and start testing.
Final Thoughts
Honestly, this process felt pretty intimidating the first time. There were a lot of unknowns, and it almost took more time to figure out than building the app itself. Even my dog, who’s been my most loyal tester, was starting to lose faith.
But once I got through it, everything made more sense—and each deployment after that became a lot easier. So stick with it! Push through the learning curve and don’t let this deployment step hold your app back. You’re closer to done than you think.
If you found this guide helpful, be sure to check out more development tips and insights over on the Keyhole Software blog. You’ll find other great resources to help you build, deploy, and scale your applications.
More From Andy Link
About Keyhole Software
Expert team of software developer consultants solving complex software challenges for U.S. clients.
Share This Post
Related Posts
Join The Thousands Of Devs Who Subscribe

Very nice write up, Andy!