In this post, I am going to demonstrate how to set up a simple Next.js web application. Next.js is a heavily opinionated JavaScript framework, in that it has a lot of conventions and recommended tools built into its design.
We’ll use Next.js version 14.2.2 to set up the groundwork for a simple web application. By “web application,” I mean an application that is designed primarily to collect input from a user in a web browser and return some output generated from that input.
Next.js Applications and Alternatives
Technologies are always changing, and it’s tempting to hop on the newest thing as soon as it starts to gain popularity. However, the decision of a technology stack should be determined by the nature of the application.
Next.js can act as a great interface and web application platform. Think of a Next.js app as a way to interface with your user, with light server-side logic that’s just enough to ensure your API keys or other credentials aren’t exposed. In a technical sense, Next.js is an Express-based Node.js server framework that delivers on-demand React applications by utilizing a lot of server-side caching.
In a practical sense, Next.js gives you direct control over the client-side experience delivered to your visitors from the server on each visit. The server functionality in Next.js is suitable for simple restful APIs and webhooks and is not meant to be a replacement for long-running services and complex server applications requiring a lot of computational overhead.
If you want to run JavaScript throughout the full stack of a more complex application, Nest.js (note the “s” is not an “x”) is a framework with popular abstractions that folks with a Java or C# background will find familiar, such as powerful annotations and long-running task management. Express is a lightweight framework that powers both Nest.js and Next.js internally but can be used by itself to quickly spin up a simple application or API.
If you really want to learn the internals of JavaScript, you can opt to use plain Node.js to set up a simple bot or microservice, installing your own dependencies as needed. Make the development choices that cover your minimum viable requirements the quickest, get you to the part you’re excited to work on as soon as possible and provide enough flexibility to make your application truly unique and adaptable to future requirements.
Setting Up a Next.js Web Application
Since you’ve read this far or skipped past the above, this guide assumes you have Node set up and ready for development. If not, you can download the program setup from the Node.js website.
First, let’s create a new Next app called nextjs-intro. In this example, we will be using the default dependencies, as well as a src directory, but you may skip any tools you don’t wish to use and substitute your own. The documentation for create-next-app can be found on the Next.js website.
npx create-next-app nextjs-intro
✔ Would you like to use TypeScript? Yes
✔ Would you like to use ESLint? Yes
✔ Would you like to use Tailwind CSS? Yes
✔ Would you like to use `src/` directory? Yes
✔ Would you like to use App Router? (recommended) Yes
✔ Would you like to customize the default import alias (@/*)? No
Installation Options
I’ll give a brief overview of the technologies we just installed. Each of these has a unique and valuable role in our application.
TypeScript gives us type safety and is becoming an industry standard. If you aren’t familiar with (or don’t care to use) TypeScript, you don’t have to. You can omit the types from the upcoming examples, giving them .js and .jsx extensions instead.
ESLint is a very simple tool that can catch issues in real-time. Configure your IDE with the appropriate plugin, and it will help keep your code legible for your future self and others who might want to read it.
Since Tailwind was included in our installation, its class-based syntax will be available for styling our classes and building out our web app quickly. If you don’t care to use Tailwind, feel free to disable it and write your own CSS classes.
I like to use a src directory as a parent for my app directory, but if you choose not to, your app directory and any peers will need to exist at the project root level along with your configuration files. This works fine if you prefer to keep your paths a bit shorter.
The alternative to using the new App router is using the old Page router. There’s no good reason to use the Page router unless you already know how to use it, so we’ll use the App router for this guide.
You can update the import alias here, which can be used to grab packages from an external library. We won’t be implementing this functionality in this tutorial, but the default @ will be replaced completely by whatever you enter here, such as @keyhole or @trains. You will use this in your import paths when importing dependencies from outside of your app directory.
Customizing Your Landing Page
To see what you’ve just installed, run the following scripts to install dependencies and start the default app in development mode.
cd nextjs-intro
npm i
npm run dev

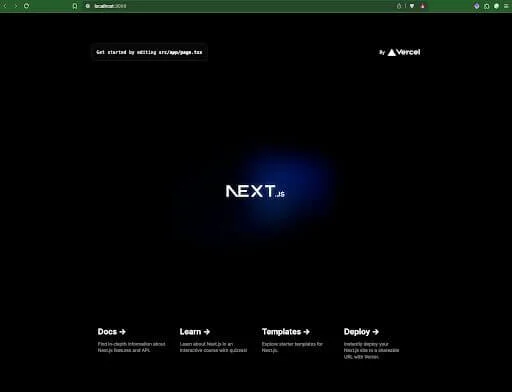
You can see the definitions for these scripts in your package.json under scripts. You can also modify these or add your own as your project grows. If everything is running correctly, you will see the default page on http://localhost:3000/ in your web browser.
If you used the same options I did above, you can find and edit the content for your landing page at src/app/page.tsx. That .tsx means this is a “TypeScript eXtensible markup language” file, a common standard for modern Node.js applications. It will look something like this.
import Image from "next/image";

export default function Home() {
 return (
   <main className="flex min-h-screen flex-col items-center justify-between p-24">
     <div className="z-10 w-full max-w-5xl items-center justify-between font-mono text-sm lg:flex">
       ... several lines of JSX ...
     </div>
   </main>
 );
}
Much of the syntax here will be delivered to the visitor’s web browser the same way it went in, automatically supplemented by whichever tailwind styles you use. That means you should be able to use the tags you might already be familiar with in HTML, such as div and p, change a few property names (such as class to className), and build out a basic site through markup alone. If you have previous experience with React or any XML-based template language, this will be very familiar to you. If not, a next.js project is a great way to learn.
Using Tailwind and its implementation of Flexbox, you should be able to build out a simple landing page for your visitors within a few minutes. Note that the Next.js has several built-in components, such as Image, you can use to replace default elements (such as img) and enjoy some extra options.
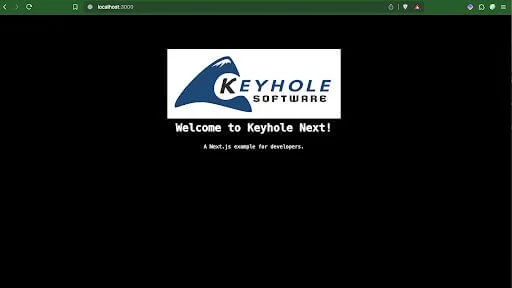
The use of priority in the below example means this image is important and will load first. The value of src will point to the contents of public/ in your project root. Replace the default images here with your own logo, and update the src, width, and height to suit your page’s new layout. You can find documentation for Image and other Next.js components here. You may end up with something basic like the below.
import Image from "next/image";

export default function Home() {

 return (
   <main className="flex min-h-screen flex-col items-center justify-between p-24">
     <div className="z-10 w-full max-w-5xl items-center justify-between font-mono text-sm flex flex-col">
         <Image className="" src="/your-app-logo.ext" alt="Your App Logo" width={480} height={192} />
         <h1 className="p-2 text-3xl font-bold text-center">Your App Title Here</h1>
         <p className="text-center mt-4">
           Your App description here.
         </p>
     </div>
   </main>
 );
}

Adding a Server Page
Adding another route to your website is as easy as creating a directory and a file. The directory path of a file typically should match its route name. For example, if you want to have a page at http://localhost:3000/your-route-here, you’d create the file src/app/your-route-here/page.tsx. Each page will use the same layout.tsx as your landing page by default. For more information, see the official Next.js documentation on routing.
export default async function Page() {
 ...your server-side logic here...
  return (
   <main className="flex min-h-screen flex-col items-center justify-between p-24">
     <div className="z-10 w-full items-center justify-between font-mono text-sm flex flex-col">
         ...your content here...
     </div>
   </main>
 );
}

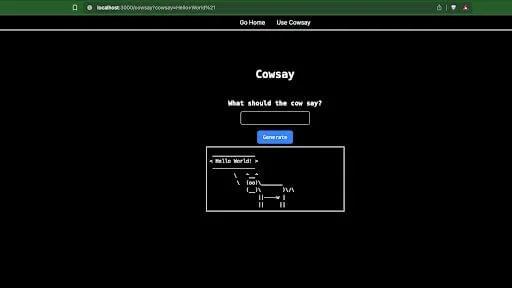
By default, your page view will be a server component, which means your logic will run on the server and a static view will be returned to the user from the server. If you know basic HTML and some Tailwind and/or CSS, you can already start to build out the look and feel of your site. To have your server read and respond to user requests, check out the docs for dynamic routes, or see the example below implementing a favorite ASCII art generation tool of mine, cowsay.
import { say as cowsay } from "cowsay";

export default function Page({ searchParams } : { searchParams : { cowsay: string } } ) {
 const cowText = searchParams.cowsay ? cowsay({ text: searchParams.cowsay }) : undefined;

 return (
   <main className="dark flex min-h-screen flex-col items-center justify-between p-24">
     <div className="z-10 w-full items-center justify-between font-mono text-sm flex flex-col">
         <h1 className="p-2 text-3xl font-bold text-center">Cowsay</h1>
         <form className="flex flex-col items-center mt-8 p-2" action="/cowsay" method="GET">
           <label htmlFor="cowsayInput" className="text-lg font-bold mb-2">What should the cow say?</label>
           <input type="text" id="cowsayInput" name="cowsay" className="border border-gray-300 rounded-md p-2 bg-transparent" />
           <button type="submit" className="bg-blue-500 text-white rounded-md px-4 py-2 mt-4">Generate</button>
         </form>
         <pre className={'border-solid border-2 p-2 min-w-96'}>{cowText}</pre>
     </div>
   </main>
 );
}
In Next.js, you can read in a query string on the server by reading searchParams from the props handed down to our page.tsx. By calling in searchParams, we are implicitly telling Next.js that something about our page will need to be generated at request time. This is no longer a static, unchanging HTML document. Rather, the content of the HTML document our visitor views will be different based on the value of cowsay in our searchParams.
This allows the server to respond to individual queries with custom-generated content, rather than returning the same cached page. For more in-depth information on what is happening, see the Next.js documentation for dynamic rendering of server components.
Global Site Layout
Looking in the src/app directory, there are a few other files you can edit to modify the global layout and HTML headers. The structure of your HTML document, which will serve as a wrapper for your application, can be modified in layout.tsx.
If you are comfortable writing CSS, you can update the default styles in globals.css, and if not, there are a ton of templates available on the internet to help you get started. To update the look of your site further, you can replace the default favion.ico with one of your own designs using a tool like icon converter or a graphics editing program. You can find the documentation for the full Next.js project structure here. A good start here would be to add navigation between our pages.

import type { Metadata } from "next";
import { Inter } from "next/font/google";
import "./globals.css";
import Link from "next/link";

const inter = Inter({ subsets: ["latin"] });

export const metadata: Metadata = {
 title: "Your App Title",
 description: "Your app description.",
};

export default function RootLayout({
 children,
}: Readonly<{
 children: React.ReactNode;
}>) {
 return (
   <html lang="en">
     <body className={inter.className}>
       <nav className="flex justify-center items-center w-100 border-b-2">
         <Link className="p-2 mx-2" href="/">Home</Link>
         <Link className="p-2 mx-2" href="/your-route-here">New Page</Link>
       </nav>
       {children}
     </body>
   </html>
 );
}
Note that we are importing the Link component here, and setting a nav bar to the top of the page using Tailwind.
Ongoing Development
The above example is nice and simple because it relies entirely on the server for processing. However, to truly appreciate the advantages of JavaScript, some of your code will usually need to run in the browser, some of your code will need to run on the server, and you’ll need to keep that in mind while developing and debugging. I’ll go over a few key points to help get you started.
Adding Client-Side React
In the previous example, we were collecting user input through a plain HTML form, posting the user’s input right back to the same endpoint we just loaded, then returning a custom, fully rendered page, based on that endpoint. In some cases, such as when using fullscreen React applications, you may wish for an entire page to load on the client’s device rather than being rendered on the server.
In this case, you can add "use client"; as the very first line in your Page.tsx. Note that the layout will still be rendered on the server. This allows you to add contexts, hooks, and all the other React things you may already be familiar with. If not, you have a great canvas here for building out this React-based Tic-Tac-Toe game. Select this, or any other React Tutorials you find interesting, and see if you can implement them in your new Web App.
"use client";
...your imports and other client functions here...

export default async function Page() {
 ...your page here ...
}
Client vs. Server Components
Once you gain some familiarity with Next.js, you likely want to have a mix of server components and client components in your pages. To that end, we can add a file at app/components/your-component.tsx.
"use client";
...your imports and other client functions here...

export default async function YourComponent() {
 ...your component here ...
}
When you import this component into a server page, the component’s code will be forwarded to the client’s browser. This means you can actually have several client views contained in your page without your entire page being rendered on the client. Try turning the cowsay example above and the Tic-Tac-Toe game example from the React documentation into standalone components. Note how they behave differently when you include them in the same page.
... your imports here...

export default async function Page({ searchParams } : { searchParams : { cowsay: string } } ) {
 ...your server-side logic here...
  return (
   <main className="flex min-h-screen flex-col items-center justify-between p-24">
     <div className="z-10 w-full items-center justify-between font-mono text-sm flex flex-col">
         <CowSay text={searchParams?.cowsay}/>
         <TicTacToe />
     </div>
   </main>
 );
}
Conclusion
Next.js is a flexible framework allowing you to spin up simple, restful web services with both server-side and client-side functionality. By experimenting on your own with what we covered here and browsing the documentation and resources provided, you should be able to deploy a basic sandbox to test and publish your web app ideas quickly.
This is a blog, and as such, you can ask questions and receive (hopefully) helpful responses from me or someone else with the resources to help you. There are several bright developers here at Keyhole Software with experience in Next.js, React, and other technologies I’ve mentioned in this post.


