Recently on a client project, I was tasked with creating an Angular application that contained a form that displayed conditional inputs. In this article, I will walk through the strategy I implemented to accomplish this goal. My hope is that this blog will give you a starting point for creating your own complex Angular Reactive forms.
Let’s get started!
Setup
Before we jump into the code, let’s make sure we have everything we need to work on our form.
Start by issuing the following command to see what version of Node we are running.
node --version
If our system returns a value, then we can use the following command to check to see if Angular CLI is installed.
ng version
If either of these do not return a value, then please visit Angular’s Local Environment Setup and follow the instructions in the Prerequisites to Install the Angular CLI sections. Once that is done, we can create our project.
To create the project in your desired directory, enter the following command.
ng new complex-reactive-forms
Now, we can navigate into our project and run it.
cd complex-reactive-forms
ng serve -o
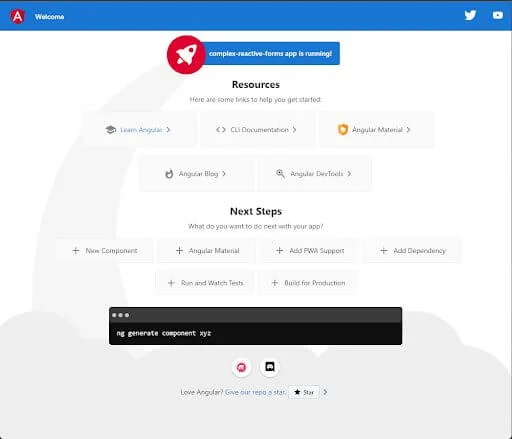
Once the application has started, you should see that the following has opened in your browser.

With that, we are all ready to start building our Complex Reactive form!
Create the Parent Form
Our complex form will take shape as one parent form containing one or more child forms.
The first thing we should do is replace the default code in our app.component with the code for our form. In the app.module.ts, make sure to add the ReactiveFormsModule to the list of imports.
imports: [
    BrowserModule,
    ReactiveFormsModule,
  ],
Now, open up app.component.ts, add the reactive form group, and add the FormBuilder to the constructor.
parentFormGroup: FormGroup = this.formBuilder.group({
    parentInput: ''
  });

constructor(private formBuilder: FormBuilder) {}
In app.component.html replace the boiler plate html with
<div>
  <form [formGroup]="parentFormGroup">
    <label for="name">Parent Input: </label>
    <input formControlName="parentInput" />
  </form>
</div>
And just like that, we now have the parent form created for our complex form. Nice work!
Create a Base Child Component
To make our child forms easier to use and to avoid repeating common code over and over, let’s build a base child component that will hold all our common code. This base component can be extended by our other child forms.
Generate the base child component with the ng generate command.
ng g component child-base
Our base child will hold the form group for child forms to come, and it will also contain two Outputs that the parent form can use to work with each child form.
In child-base.component.ts, add a default empty form.
form: FormGroup = new FormBuilder().group({});
Our first Output will be used for informing the parent form that our child form is ready.
@Output()
formReady = new EventEmitter<FormGroup>();
Our second Output will be used for informing the parent that the child component has been destroyed and should be removed.
@Output()
removeForm = new EventEmitter<boolean>();
Now, we implement OnDestroy for our ChildBaseComponent and add our ngOnDestroy.
ngOnDestroy(): void {
    this.removeForm.emit(true);
}
This is all we need for the purpose of this post, but tuck this away in your memory. The base is a good place to put any code that all children components may use.
Create the First Child Form
Generate the first child component with the ng generate command.
ng g component child-one
Now that we have our child component created, we need to make sure that it is extending the base component…
export class ChildOneComponent extends ChildBaseComponent implements OnInit
…and call super() from our constructor.
constructor() {
    super();
}
Now, we can inject the FormBuilder and create our form on Init.
constructor(private formBuilder: FormBuilder) {
    super();
}

ngOnInit(): void {
  this.form = this.formBuilder.group({
    inputA: '',
    inputB: '',
  });
}
After the form is created, we will then want to trigger our Output to let our parent form know that it’s ready.
this.formReady.emit(this.form);
In the child-one.component.html, replace the default with…
<div>
  <form [formGroup]="form">
    <label>Input A: </label>
    <input formControlName="inputA" />
    <label>Input B: </label>
    <input formControlName="inputB" />
  </form>
</div>
Add The Child to The Parent
Now that we have the child component all ready, let’s add it to the parent component. Open app.component.html and add the child component after the parent’s input.
<app-child-one></app-child-one>
When the child component is ready, we will want to add it to the parent’s form group. In app.component.ts, add a new method that will add the child form group to the parent form group. The method will have two parameters: one for the name of the control to be added and one for the form group we are adding.
addChildForm(name: string, formGroup: FormGroup): void {
  this.parentFormGroup.addControl(name, formGroup);
}
Then, we add the output to our HTML.
<app-child-one (formReady)="addChildForm('childOne', $event)"></app-child-one>
Now when the child emits the event of its form group, it will be added to the parent’s form group with the name of ‘childOne’.
The last step is to add some cleanup for when the child is destroyed. Add a removeChildForm method to app.component.ts.
removeChildForm(name: string): void {
  this.parentFormGroup.removeControl(name);
}
Let’s also add the output to our HTML.
<app-child-one
  (formReady)="addChildForm('childOne', $event)"
  (removeForm)="removeChildForm('childOne')"
></app-child-one>
Conclusion
With the above code, we can now create as many smaller forms to use in our parent form as needed. With this exact setup, we can use conditional code in our parent component to decide which of our child component(s) we may need to display to get the desired form inputs for the condition. Now, we can make forms as simple or as complex as we need in a clean and code concise way.
To see the full project, check out my GitHub Repository. If you have any questions or comments, drop them below. I’d love to hear your feedback!
If you enjoyed reading this post, there are plenty more on the Keyhole Dev Blog. Subscribe so you never miss out!


