Leveraging Docker to Quickly Setup an Object Detection API
In this blog, we’re going to leverage Docker containers to quickly install an object detection software called DeepStack. We’ll also use Docker containers to install a companion software called DeepStackUI, which will help us quickly set up the data we need for processing our images.
DeepStack is an open-source software that leverages AI and provides an out-of-the-box model of objects to utilize in processing. You do not have to settle for the model they provide! You can train DeepStack to learn new objects and even to recognize specific faces and scenes.
Even if you don’t have a need for this particular software right now, the concepts we’ll cover are still valuable. It will illustrate just how quickly you can set up software with containers utilizing Docker.
If you’re looking for an excuse to utilize DeepStack in your current project, here are some ideas. You could use its powerful processing to detect …
- If tools have been returned to the appropriate area in a workspace.
- If a car or person has entered into an area it shouldn’t have.
- Is your dog still in the backyard.
- You could even set up DeepStack to do facial recognition!
Alright, let’s get to it!
Assumptions
We will assume two things for this blog.
- You are running Windows. (If not, follow Microsoft’s install WSL 2 on Windows instructions.)
- You already have Docker installed and are running with WSL 2. (If not, use Docker’s Get Started details.)
Using Docker for DeepStack Installation
Installing DeepStack is a very simple process thanks to the magic of Docker and WSL 2.
With WSL installed, you can open the Windows menu and type “WSL” and open the WSL command prompt option presented to you.
From this prompt, we’ll execute the following line.
sudo docker run -e VISION-DETECTION=True -v localstorage:/datastore \
-p 80:5000 deepquestai/deepstack
This will take some time to finish running depending on your internet connection speeds since it will need to download and extract the container. Once it’s completed, you should see an output similar to the following.

This indicates that the DeepStack software is running and ready for us to use!
You should now be able to test this by navigating to http://localhost. You should see a page that shows the following image in it.

For now, leave this WSL prompt window open, and let the DeepStack container continue to run and output to it while we move ahead with the next step: installing DeepStackUI.
Using Docker for DeepStackUI Installation
Now that DeepStack is running, we could immediately start interacting with it via its API. Awesome!
However, it’s a bit difficult to know exactly what to send the API without a lot of trial and error. Luckily, yet again, we can leverage a Docker container called DeepStackUI to quickly set up the object detection commands we’d need.
DeepStackUI will provide us with a user interface in which we can quickly scaffold our image processing and object detection API parameters. It can also be incredibly helpful for debugging false positives and other detection anomalies.
Let’s get to it!
Open a new WSL command prompt by hitting the windows key, typing “WSL,” and selecting the command prompt option there.
From this new prompt window, run the following command but note that you will need to replace the DEEPSTACK_IP value (192.xxx.x.x) with the IP address of the machine that you are working on.
sudo docker run -p 8501:8501 -e DEEPSTACK_IP=’192.xxx.x.x’ robmarkcole/deepstack-ui:latest
Once the image is downloaded and extracted, the Docker container should start up and show an output similar to the following.

Now, we can test in the browser by navigating to http://localhost:8501/. You should hopefully see an output that contains:
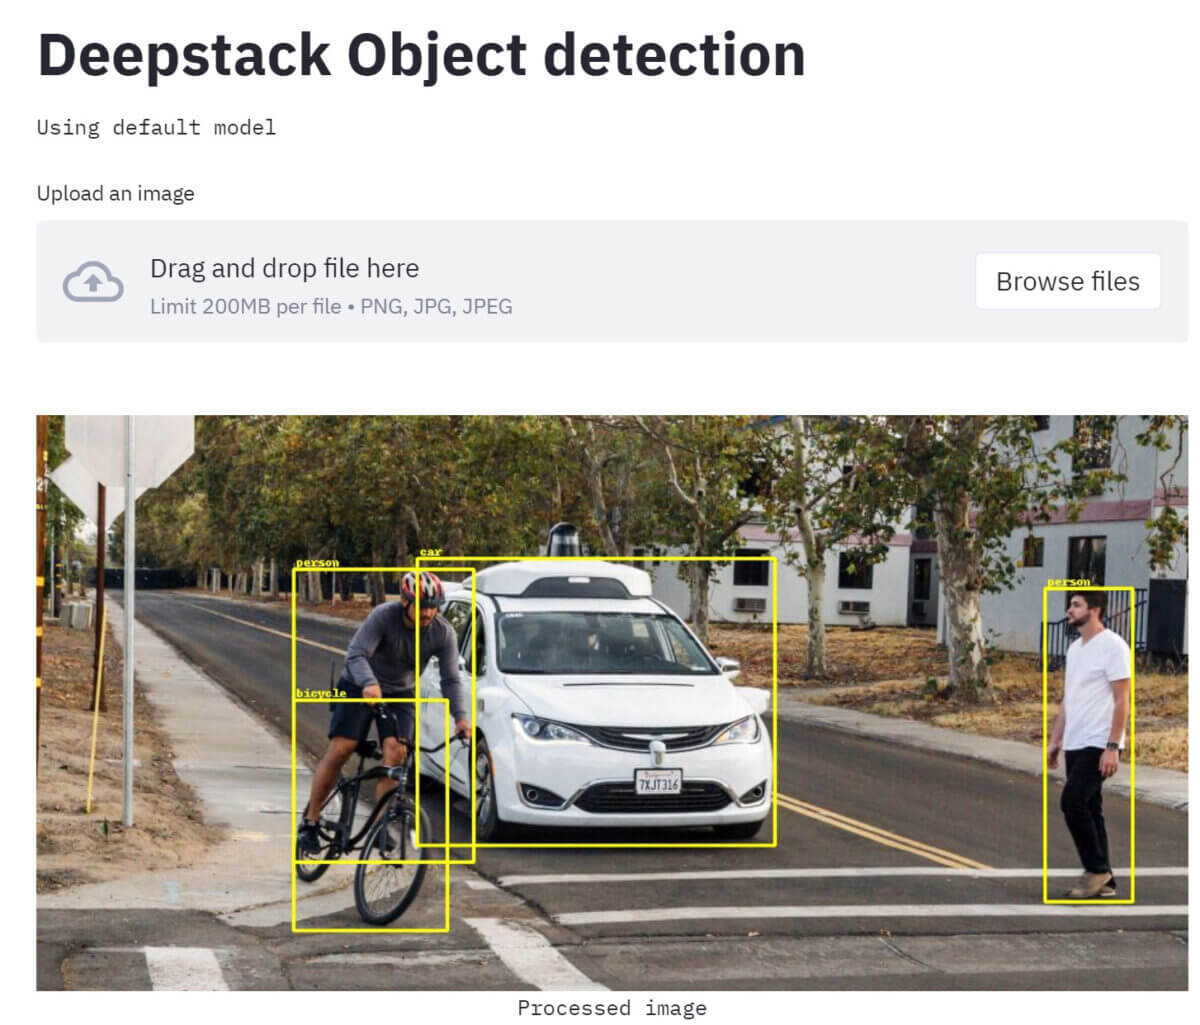
If this is what you’re seeing, you are now ready to start playing around!
Using DeepStack
From here, with the left-hand sidebar, we can start changing thresholds and values that will help us determine how we would want to talk to the DeepStack API. Being able to do this via a rich UI will really help speed up the development process, as we can quickly determine the values that the API expects in a visual manner.
The ROI section in the left-hand sidebar is essentially the cropping boundaries for the image that we would like DeepStack to focus on. If you adjust these slightly, you’ll start to see green lines show over the image. You can use the provided sliders to quickly create a bounding box on any specific area that you’d like DeepStack to run its object detection.
As you are adjusting these values, DeepStackUI is interacting with the DeepStack API container sending API requests. You can see this interaction by going back to your WSL command prompt from earlier where DeepStack API is running. You should see new lines showing up that look like this.

Wrapping It Up
In this blog, we utilized the strengths of Docker containers to quickly spin up two separate containers that we could utilize for our software development needs – one running the DeepStack API software and the other running a utility to help us get started with the DeepStack API.
The best part is that once we are comfortable with our setup, we could quickly and easily stop and remove the DeepStackUI utility container to free up resources all while continuing to run the DeepStack API software without interruption.
Thanks for following along, and I hope you found this blog informative!
When you are ready to finish up working with DeepStack API and DeepStack UI, you can close their WSL command prompt windows. This should stop the container from running any further.
If you’d like to learn more about utilizing Docker, check out “Azure Web Apps in Docker Containers” – another recent post on the Keyhole Dev Blog.
More From Adam Costenbader
About Keyhole Software
Expert team of software developer consultants solving complex software challenges for U.S. clients.
Share This Post
Join The Thousands Of Devs Who Subscribe

What’s the best way to keep Deepstack patched and updated when working with dockers?