
Blazor Server in .NET 6 – Part Three
Welcome to Part 3 of the Blazor Server in .NET 6 blog series! Hopefully you’ve already gotten the chance to dive into Part 1 and 2. In this blog, we will run through an installation of Radzen Blazor, a free component library for Blazor developed by Radzen Ltd. There are a few other component libraries out there, including MudBlazor, SyncFusion, Telerik, and MatBlazor, among others.
I’ve only used Radzen up to this point but plan to make a follow-up blog on my experience with SyncFusion, as they have made it free for developers (that is, up until your company makes more than 1 million a year, then they do charge). We will change our boring cards to cards provided by Radzen, as well as a dialog service and form component to display a Create Character modal easily. Radzen currently has 60+ components, and I plan to dive into their data grids and charting in a full blog later on. If anyone has struggled with some of the finicky charting in Javascript, then you may enjoy that post. It could be I just suck at Javascript charts! Anyway, on to Radzen Blazor!
Installation
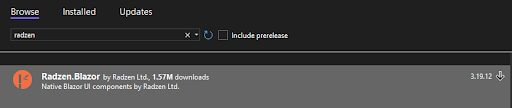
First, you will want to install the Radzen.Blazor NuGet package.
Then, add the stylesheet and Javascript shown below to the _Layout.cshtml file.


Updating the CharacterInfo Component in the Radzen Panel
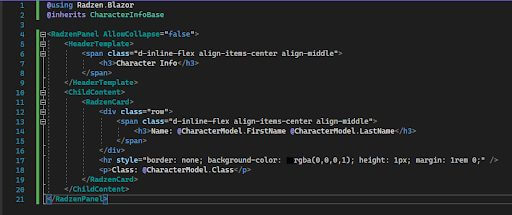
In order to update the CharacterInfo component, you’ll want to remove the code inside the CharacterInfo.razor file and add the code shown below. The RadzenPanel component has three templates including HeaderTemplate, ChildContent, and SummaryTemplate. Additional documentation for all components can be found on the Radzen Blazor website.
One of the nice things about blazor components is that the tags can be seen with IntelliSense. If you add a space after AllowCollapse, you will see all the properties that the RadzenPanel uses. This works for any other component as well.
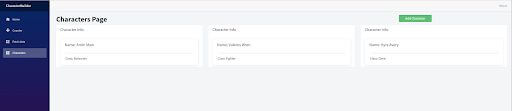
When you run the application again and navigate to our characters page you should see the Panel and Card components with our character information inside. I would encourage you to play around with some of the component’s features, as they have properties to collapse the Panel in addition to some other nice features.

Adding the Radzen Dialog
We all know how nice it can be to have a clean pop-up experience. Many sites I have seen use clunky pop-up modals that don’t look right or are all different, as they look to be individually built for each use. RadzenDialog gives us a way to standardize our dialog with an easy-to-use component. This is not a fix-all for dialog boxes, but it is a good step in the right direction, especially if you are coming from using .NET MVC PartialViews. Take the following steps to add the RadzenDialog:
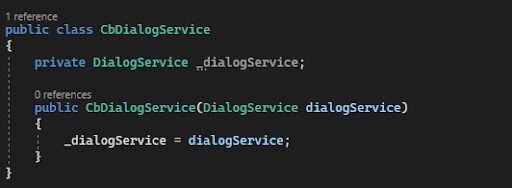
- First, we are going to create our own dialog service as a middleman between the components and the
RadzenDailog. Create a class calledCbDialogService. This will hold an instance of theDialogServiceas a private property that will be injected using DI.
- Add the
DialogServiceandCbDialogServiceto the DI container. You can do so with or without an interface at the moment, however, you may eventually want an interface for theCbDialogService.

- Add the
RadzenDialogcomponent to theMainLayout.razorfile. The styling for the Dialog is configured to work as I have put it in the picture below.

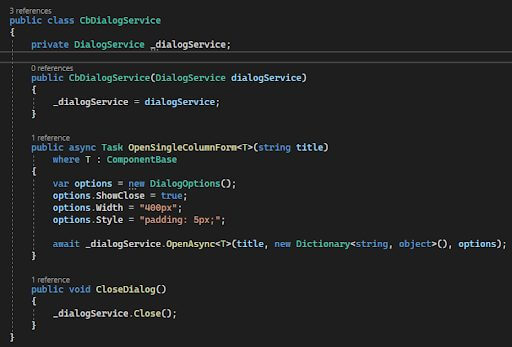
In the CbDialogService, we are going to add a method that allows us to pass a component to the dialog service, while also setting some dialog options to use. This is a way to keep consistent form styling throughout our single-column forms. Our method passes in a Generic T of Type ComponentBase, which makes sure that the class we pass in is a component. This is required by the DialogService to function properly. Then, we await the DialogService to open our component in a Modal!
If your component contains parameters that you need to pass in, that can be done in the form of a Dictionary<string, object>. This also works for passing actions or methods down to other components in your modal. I will demonstrate in a later blog how to pass a delegate down to a component in the DialogService. Although this shouldn’t be needed often, as you will want to encapsulate your functionality inside the component, as opposed to passing the function in when we use event-based components!

Now, let’s inject the CbDialogService into our BaseComponent so every component in our app has access to the DialogService.

Next, let’s add the AddCharacterForm component. We will do this the same way that we have done our other components with a .razor file and a base class in the code behind file.
We will need a CharacterModel that will store the values for our new character and a submit method that will eventually save our character. After that, close the dialog service.

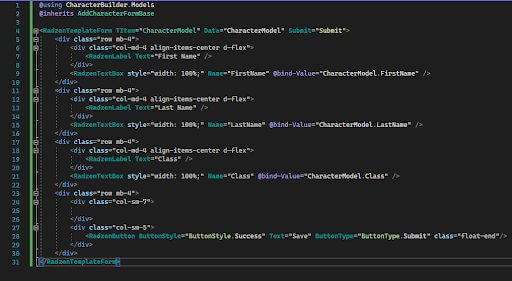
In the .razor file for the AddCharacterForm, we can use the RadzenTemplateForm component to create a basic form layout. In the figure below, I have used the RadzenLabel and RadzenTextBox components for consistency and styling.
In order to use the Blazor two-way data binding, we need to add the @bind-Value attribute to the RadzenTextBox components. This will bind the value to our character model in the code behind file.
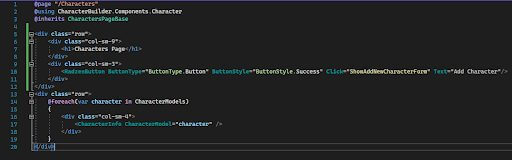
Back on the Characters page, we need to add a method to show the AddCharacterForm in a dialog box. We can use the CbDialogService.OpenSingleColumForm method that we just created to open our form in a pop-up dialog box. We can do this by passing the Form component as the Type argument.

We can also add some styling to the Characters page using bootstrap by adding a new Button component. The ButtonStyle.Success will add the green styling and the Click property will pass the ShowAddNewCharacterForm method, so that when our button is clicked we will see our new form!
When you run the application you should see the button you just added on the characters page, and clicking it should pop up the AddCharacterForm component.
The save button should only close the dialog box as we haven’t added any saving logic to the application yet.
Synopsis
In part 3 of the Keyhole Blazor Server in .NET 6 series, we installed a free component library called Radzen.Blazer, updated the CharacterInfo component to easily display a Create Character modal, and added the RadzenDialog as a way to standardize our dialog with an easy-to-use component. In the next blog, we will be adding events in our blazor components. See you in Part 4!
Series Quick Links
- Blazor Server in .NET 6 – Part One
- Blazor Server in .NET 6 – Part Two
- Blazor Server in .NET 6 – Part Three
- Blazor Server in .NET 6 – Part Four
More From Ryan Flachman
About Keyhole Software
Expert team of software developer consultants solving complex software challenges for U.S. clients.
Share This Post
Join The Thousands Of Devs Who Subscribe


Discuss This Article
Subscribe
Login
0 Comments
Oldest