Recently, I was involved with a project that required the client to collect payments from their customers. This brought up many questions on the best approach to process orders to accomplish this.
We wondered, is a Stripe Elements integration the answer, or can we avoid fees and process payments ourselves? For the vast majority of companies, ourselves included, yes, Stripe is the answer. The complexity of Payment Card Industry (PCI) Compliance alone makes this a no-brainer. In addition, the development of payment infrastructure is very time-consuming and costly.
In this blog, I will discuss Stripe Elements and its integration and the best way to implement them with React. I will cover basic Stripe information, how to set up a Stripe account, and a brief code overview to help you get on your way to incorporating Stripe.
What Options Does Stripe Offer?
Stripe offers an abundance of options to integrate payments anywhere from no code, low code, and mid-level code options. To allow for the most versatility and to fully customize the look and feel of Stripe Elements, a mid-level code option is the best option for most websites.
Stripe makes the mid-level code approach straightforward with its excellent documentation, npm support, and support of multiple popular languages. This option also supports tax collection, mobile responsiveness, and various currencies and pricing models. All of this while being fully PCI compliant.
Getting Started with Stripe Elements
Okay, now you’re ready to get started.
Again, while this is not no code or low code, the process has been greatly simplified by Stripe. For further information, head on over to the Stripe documentation to explore more. For this walkthrough, I will be using React and Node.js. Click here for more examples across various languages.
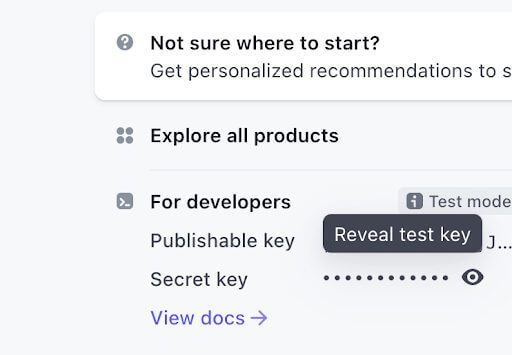
Before you can get coding, you’ll need to create a stripe account and retrieve your keys. Your keys will be in the developer dashboard.

Make sure test mode is toggled!

With that out of the way, the first step is to install the stripe server side.
npm install --save stripe
Next, we’ll add the following endpoint. This endpoint retrieves the Payment Intent (PI). The PI associates a front-end payment with your stripe key. This allows server-side payment processing to be completely removed from the equation.
Below is an example.
const stripe = require(‘YOUR_SECRET_KEY)

app.post("/create-payment-intent", async (req, res) => {
 const { items } = req.body;

 const paymentIntent = await stripe.paymentIntents.create({
   amount: calculateOrderAmount(items),
   currency: "eur",
   automatic_payment_methods: {
     enabled: true,
   },
 });

 res.send({
   clientSecret: paymentIntent.client_secret,
 });
});
Ok, now move to the front end. Go ahead and install the React and JS libraries.
npm install --save @stripe/react-stripe-js @stripe/stripe-js
CheckoutForm.jsx:
First, we will create the CheckoutForm.jsx. The code block below will be the basis for all credit card information, submission, and processing. It also relays information and feedback to the customer. Error handling occurs here as well.
import React, { useEffect, useState } from "react";
import {
 PaymentElement,
 useStripe,
 useElements
} from "@stripe/react-stripe-js";

export default function CheckoutForm() {
 const stripe = useStripe();
 const elements = useElements();
 const [message, setMessage] = useState(null);
 const [isLoading, setIsLoading] = useState(false);

 useEffect(() => {
   if (!stripe) {
     return;
   }
   const clientSecret = new URLSearchParams(window.location.search).get(
     "payment_intent_client_secret"
   );
   if (!clientSecret) {
     return;
   }

   stripe.retrievePaymentIntent(clientSecret).then(({ paymentIntent }) => {
     switch (paymentIntent.status) {
       case "succeeded":
         setMessage("Payment succeeded!");
         break;
       case "processing":
         setMessage("Your payment is processing.");
         break;
       case "requires_payment_method":
         setMessage("Your payment was not successful, please try again.");
         break;
       default:
         setMessage("Something went wrong.");
         break;
     }
   });
 }, [stripe]);

 const handleSubmit = async (e) => {
   e.preventDefault();
   if (!stripe || !elements) {
     return;
   }
   setIsLoading(true);

   const { error } = await stripe.confirmPayment({
     elements,
     confirmParams: {
       return_url: "http://localhost:3000",
     },
   });
   if (error.type === "card_error" || error.type === "validation_error") {
     setMessage(error.message);
   } else {
     setMessage("An unexpected error occured.");
   }
   setIsLoading(false);
 };

 return (
   <form id="payment-form" onSubmit={handleSubmit}>
     <PaymentElement id="payment-element" />
     <button disabled={isLoading || !stripe || !elements} id="submit">
       <span id="button-text">
         {isLoading ? <div className="spinner" id="spinner"></div> : "Pay now"}
       </span>
     </button>
     {/* Show any error or success messages */}
     {message && <div id="payment-message">{message}</div>}
   </form>
 );
}
ParentComponent.jsx:
Next, the parent component will contain CheckoutForm.jsx, which is also wrapped in a Stripe elements component. This will tie in with the backend to retrieve the Payment Intent, allowing the Stripe Elements component to do most of the behind-the-scenes magic for you. Optional styling can also be accomplished here as well.
import React, { useState, useEffect } from "react";
import { loadStripe } from "@stripe/stripe-js";
import { Elements } from "@stripe/react-stripe-js";

import CheckoutForm from "./CheckoutForm";
import "./App.css";

const stripePromise = loadStripe(STRIPE_PUBLIC_KEY);

export default function App() {
  const [clientSecret, setClientSecret] = useState("");

  useEffect(() => {
    fetch("/create-payment-intent", {
      method: "POST",
      headers: { "Content-Type": "application/json" },
      body: JSON.stringify({ items: [{ id: "xl-tshirt" }] }),
    })
      .then((res) => res.json())
      .then((data) => setClientSecret(data.clientSecret));
  }, []);

  const appearance = {
    theme: 'stripe',
  };
  const options = {
    clientSecret,
    appearance,
  };

  return (
    <div className="App">
      {clientSecret && (
        <Elements options={options} stripe={stripePromise}>
          <CheckoutForm />
        </Elements>
      )}
    </div>
  );
}
Example:
Below is an example of what the checkout screen would look like, with minimal styling, to the customer. This can be integrated almost anywhere on your website. Before anything is processed, errors or invalid card information will alert the customer. Then, when the credit card is processed, the customer will get a success message.

In Conclusion
That’s it! Not too bad. With a Stripe Elements integration, you can get a payment solution off the ground very quickly all while being PCI compliant, without breaking the bank, and with low developer requirements.
The mid-level Stripe Elements approach is a great option for many websites. It offers full customization to keep your website looking great.
Thank you for reading! Let me know in the comments below if you have questions or try this yourself, and if you liked this post, check out our other ones on the Keyhole Dev Blog.


